Showing posts with label Arduino. Show all posts

Sunday, 2 June 2019

ATTiny EEPROM usage


Tutorial: Using EEPROM on the ATTiny Series of microcontrollers

 
ATTiny EEPROM Tutroial

Intro

This is the first tutorial by Barium Electronics that will be dealing with using the internal EEPROM of an ATTiny using the Arduino IDE and also using the AVR EEPROM library.

The Arduino EEPROM library is compatible with the ATTiny range of AVR microcontrollers as the library itself is built on the standard Atmel AVR avr/eeprom.h 'library' so it is compatible with all the AVR microcontrollers.

This was originally written back in 2016 (wow...) so some things may not match what people have floating around now :)

Things needed:

  • ATTiny of your choice, I prefer the t85
  • ISP programmer/ArduinoISP (Pocket ISP, USBasp)
  • Breadboard
  • Cup of coffee

Thursday, 13 October 2016

Arduino EMI shield

So a while ago I answered a question on Arduino.SE with regards to a person wanting to shield there Arduino from EMI( Electromagnetic Interference) that was coming from some AC they were feeding into a shield on the Arduino, and thus they asked if it would be plausible to use a shield in between the Arduino and the other device to stop interference. Thus I brought out some points to help that person.

Some things I answered in it:

  • Using DC Ground
  • Using AC Earth/Ground
  • Isolating circuitry 
  • Extra, PCB layout

Tuesday, 28 June 2016

Sound sensor with Arduino, freeform


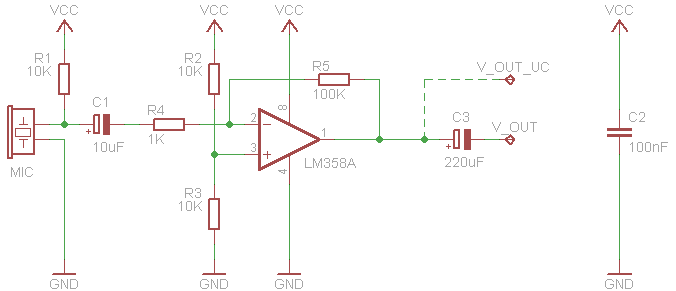
I was in need of a sound sensor board because I wanted to test some code that someone was experiencing issues with, so I scrounged around for some scrap parts and decided to make a free form circuit of the common sound sensor circuit, I used this as a base:
I made some modifications for the look of it, such as the ceramic caps and not the electrolytic ones.

The modification I made to the circuit was the addition of a comparator using the free half of the LM358. That is what the green trim pot is for at the top of the circuit.

I used enamel coated wire from a stripped transformer. The other parts were from various PCBs I have collected... Hackaday calls it Fracking.

 That seems to be about all the photos I took. But the idea is simple in that you take the wire and bend it around a cylindrical shape of your choice and arrange the curves to the way in which it best fits. 

I ran two lines straight down the centre to get Positive and Ground along the sides where the OP-AMP power pins are. Also I ran the output from the final stage down the side too. Any other connections were made however they best fitted into the arrangement.

Sunday, 19 April 2015

Weather Station - Rain Gauge

tipping bucket arduino
For the first build post I will be starting with the rain gauge. This is based off the tipping bucket rain gauge method. These are pretty easy to make and get running.